
In the last post, we looked into the steps to upgrade the vRealize Suite Life Cycle Manager solution. Now since we have the solution ready lets use it to upgrade vRealize Operations Manager.
Below we will look into the steps involved in upgrading vRealize Operations Manager to version 7.5 using vRealize Suite Life Cycle Manager.
Step 1 : Adding Binaries
To perform the upgrade using vRSLCM, we need to first add the product binaries to vRSLCM.
Download the required binaries from the my vmware website.
For upgrading vRealize Operations Manager, download the upgrade binaries for vRealize Operations.

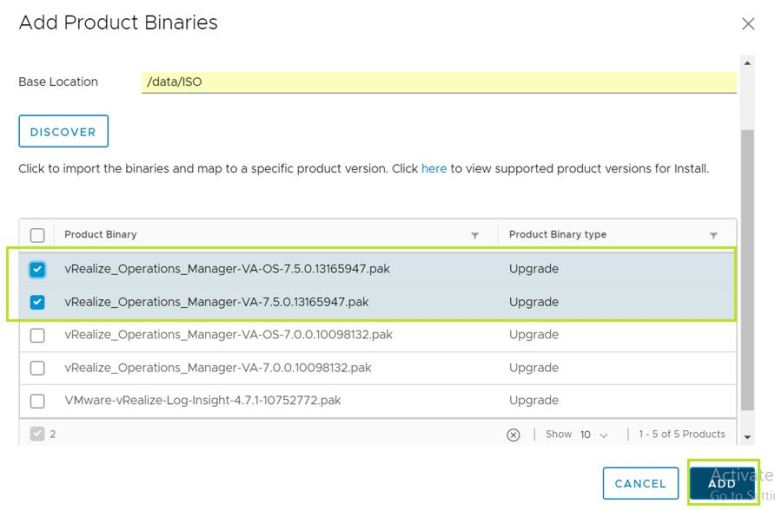
Note : In this scenario, we will be upgrading to vROPs version 7.5 For vROPs 7.5 Upgrade you need to download both the Virtual Appliance upgrade and Virtual Appliance Operating System upgrade .pak files.
Once downloaded we need to add the binaries to vRSLCM. We can do it either by uploading the packages to an vRSLCM accessible NFS location or either by uploading it locally on the appliance.
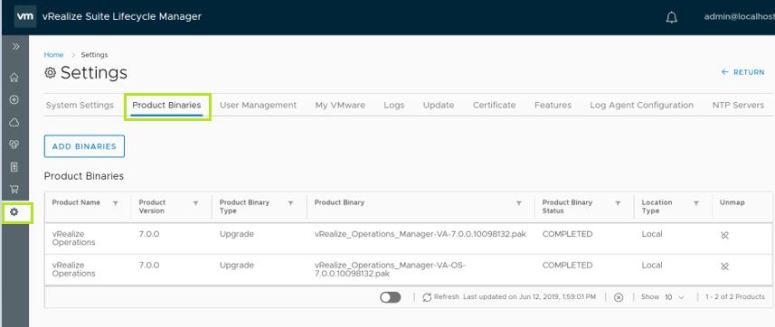
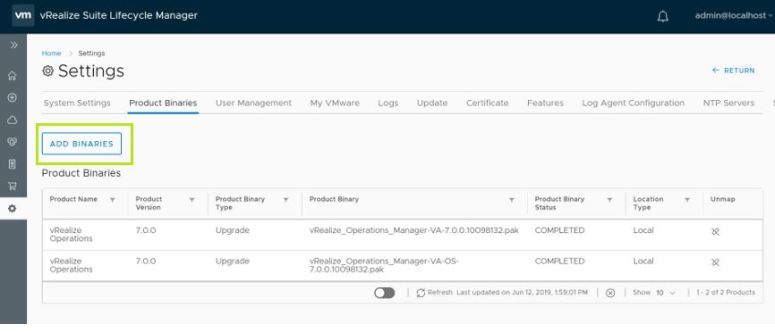
To add the binaries to vRSLCM, Login to the vRSLCM UI and Navigate to Settings > Product Binaries
Click on Add Binaries
On the Add Product Binaries screen, Select Local as in this scenario, I have uploaded the upgrade binaries directly on the appliance in data/ISO folder
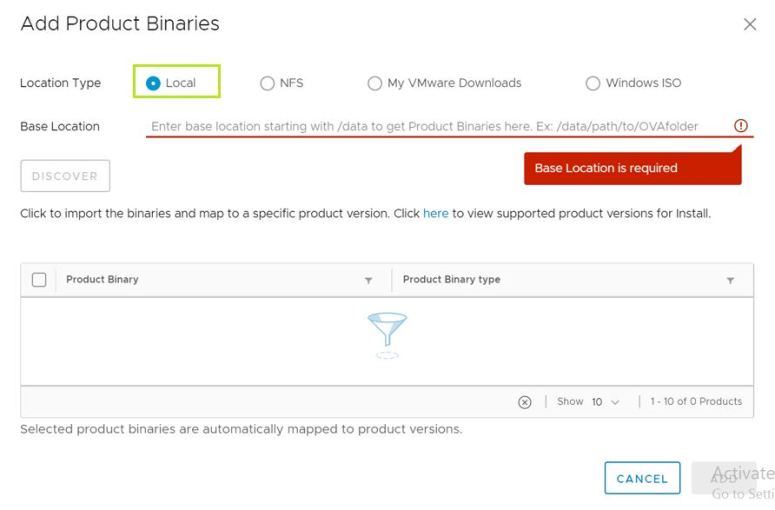
In the Base Location field, enter the location where you have uploaded the binaries. In this case it is /data/ISO
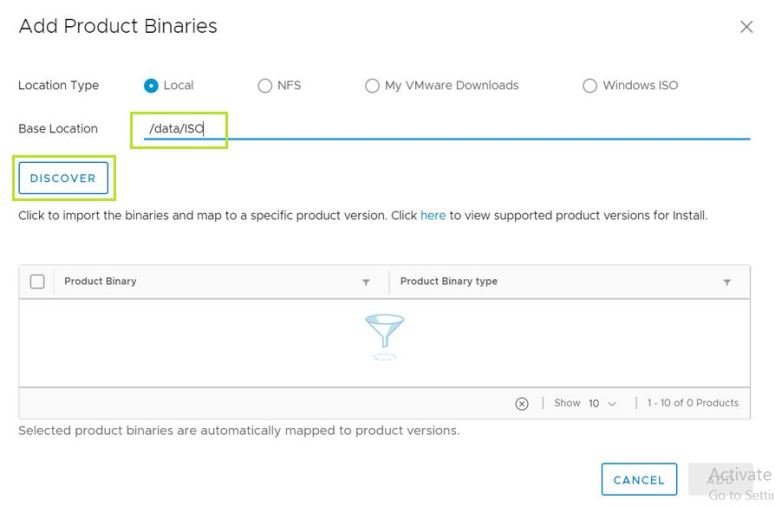
Click Discover to get the product binaries
Once our product binaries get listed, select the packages and click Add
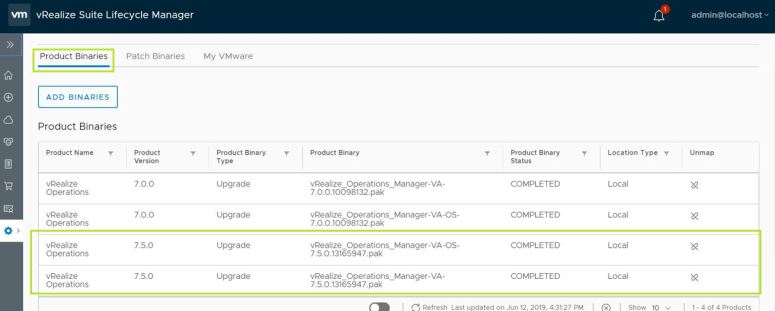
Once completed you should see them listed under Product Binaries
This completes our Step 1 for Adding Product Binaries into vRSLCM.
Step 2 : Upgrade using vRealize Suite Life Cycle Manager
Right away when you login into vRSLCM, you will see a notification alert that vROPs 7.5 is available for your environment which you can mark as Read to clear it out.
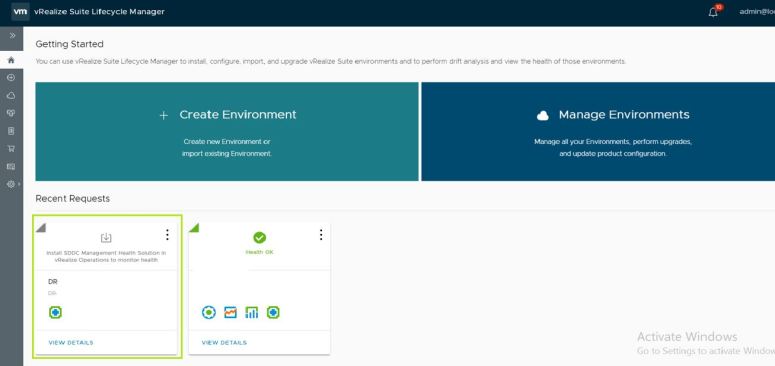
Now lets select an Environment to upgrade by clicking on an Environment in the Getting Started page
Here we will be working on the DR Environment
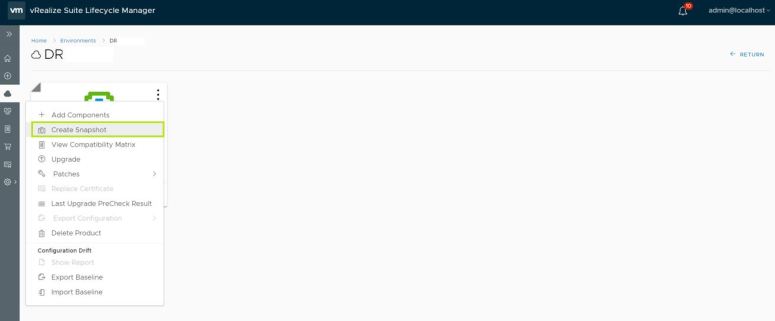
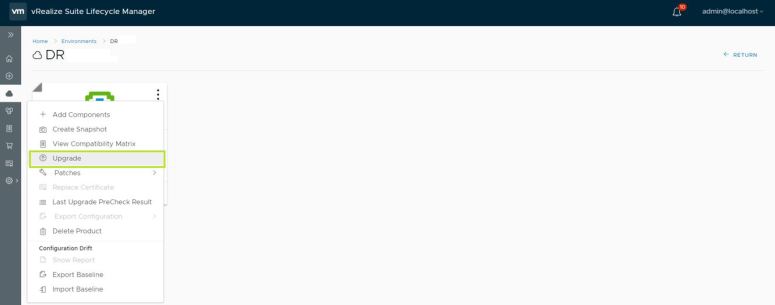
Click on the vertical 3 dots against vROPs Solution to explore the options available.
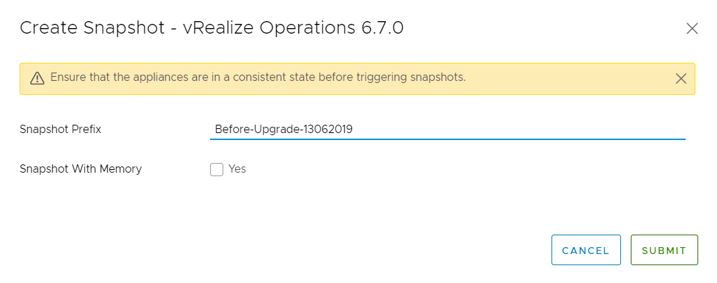
Select Create Snapshot from the menu to take the snapshot of vROPs Solution before the upgrade. This Create Snapshot task will take the snapshot for all the Nodes in the vROPs Cluster.
Ensure that the appliances are in a consistent state before triggering snapshots.
Provide a Name for the Snapshot and Click Submit
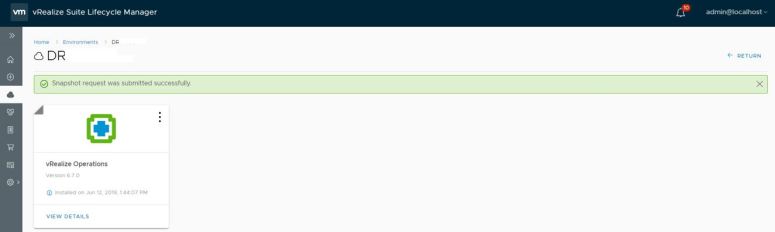
Once you click on the Submit button, you should get the “Snapshot request was submitted successfully” message
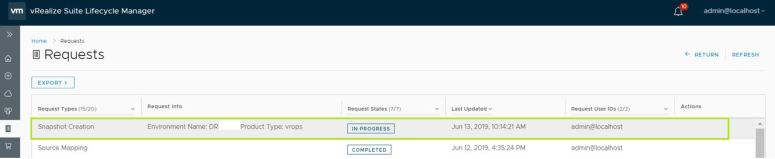
Alternatively you can monitor the progress of the submitted task by browsing to the Requests tab
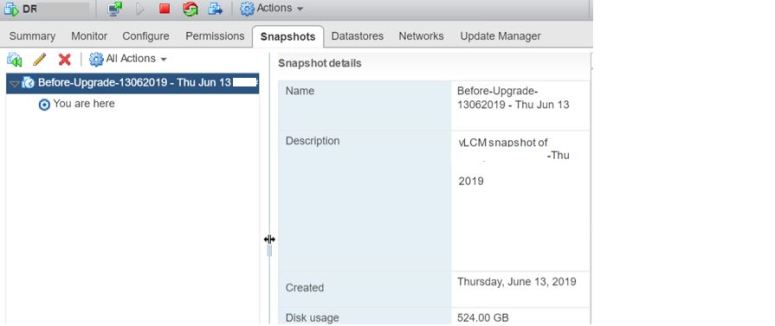
Once the Snapshot task is completed, you can login to your vCenter server using the vSphere Web Client and confirm that the snapshot exists on your vROPs Appliance
Now we are ready to Upgrade so let’s click on the vertical 3 dots again but this time let’s select Upgrade from the menu
In the Product Details screen, Select the Repository Type
In this case I have already copied the vROPs 7.5 upgrade packages to vRSLCM Binaries which I have outlined in Step 1 of this blog, therefore we are going to select vRealize Suite Life Cycle Manager Repository which will automatically select 7.5 as the product version since its the only one available in the repository
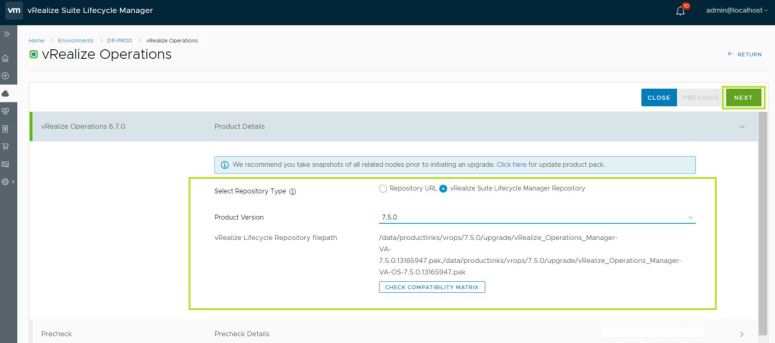
Click Next
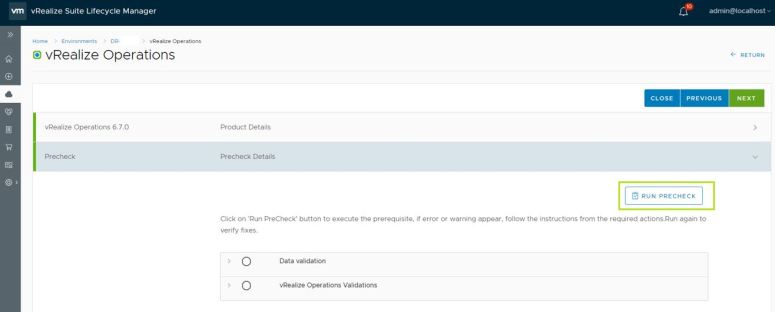
Click Run Precheck to do the Data and vRealize Operations group set of Validations
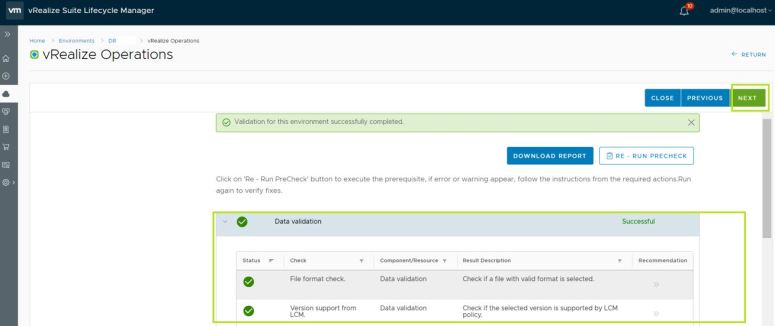
Once the Validation completes successfully with green status, Click Next
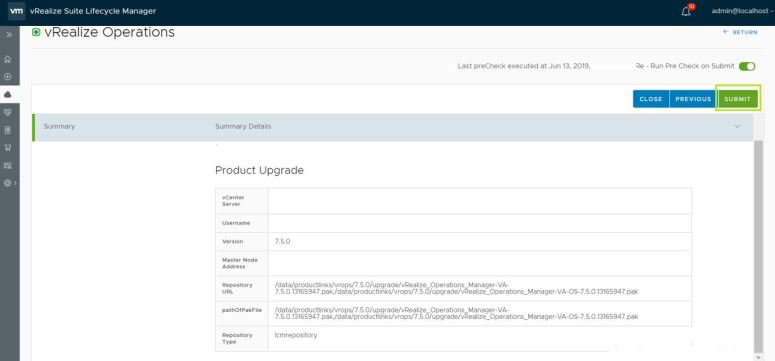
Review the Summary Details and Click on Submit to start the Upgrade process
You can monitor your Upgrade Request in the Requests tab menu
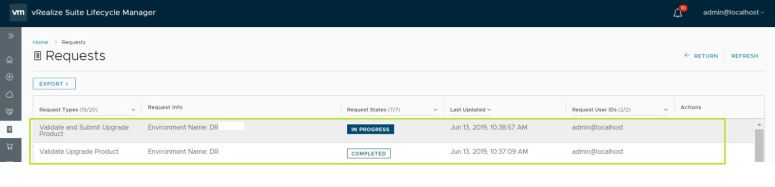
Clicking on the IN PROGRESS under the Requests States column you can track your Upgrade steps and also find what each of the tasks are doing within a step along with the time each of the steps took to complete
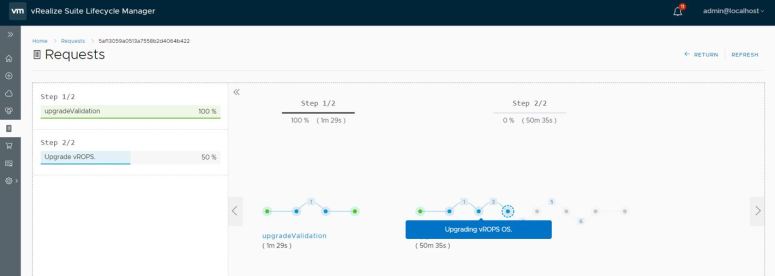
Wait until the Upgrade is completed and the status changes to Completed
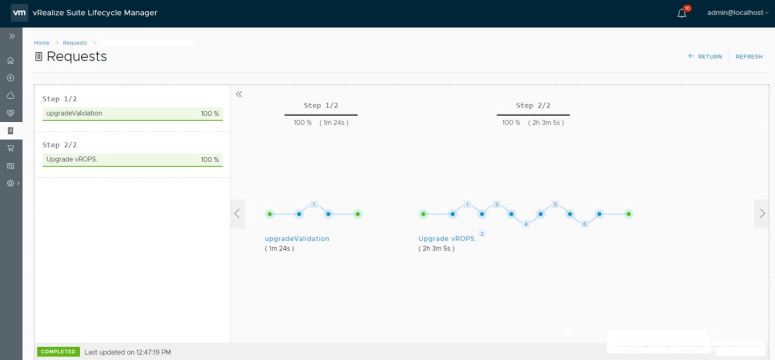
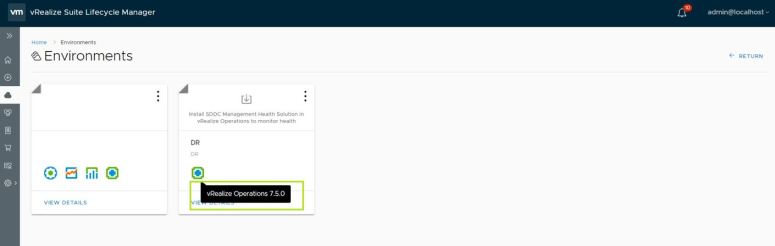
Once the Upgrade is Complete, Navigate to the Environments page, the vROPs Deployment solution should now reflect version 7.5
Alternatively, you can verify the same by logging into the vROPs UI

With vRealize Suite Life Cycle Manager, the upgrade process has been simplified where you don’t have to worry about upgrading the OS and Application component separately.
The vRealize Suite Life Cycle Manager greatly reduces required user inputs and performs streamlined pre-validation with optimized key installation and upgrade processes. It delivers instant benefits with significant reduction in the time-to-deploy / upgrade with much better user experience.
This Concludes our Post for Upgrading vRealize Operations using vRealize Suite Life Cycle Manager.
Happy Learning People !
